Vector Selector
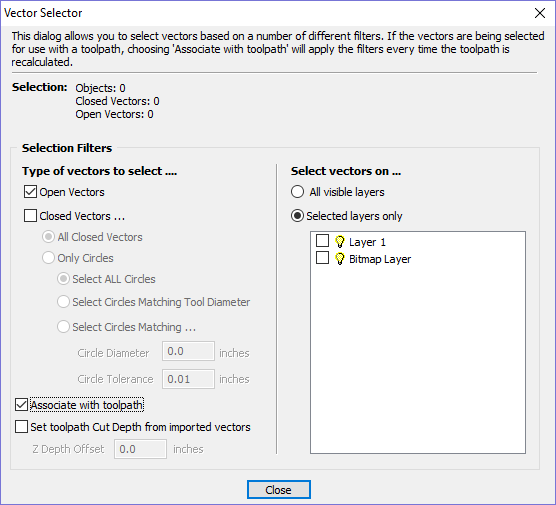
This tool allows you to easily select vectors which meet a set of criteria, such as open, closed, circular and also matching constraints based on layers. The dialog can be accessed from the Edit ► Vector Selector menu item, or from the button on each toolpath form. When the command is executed the dialog shown is displayed.
The dialog is used to configure a set of 'filters' that determine which vectors will be selected. A filter is enabled by clicking on its check box, or selecting a 'radio button' option, the current selection will be updated with all the objects in the file which match the current filter options.
Generally you will start at the top of the dialog and work downwards, specifying more and more explicit filters to determine the required selection exactly.
The simplest option is just to use the form to Select Closed Vectors in the job or Select Open vectors (you can specify both, in which case all vectors will be selected as long as they are on a visible layer).
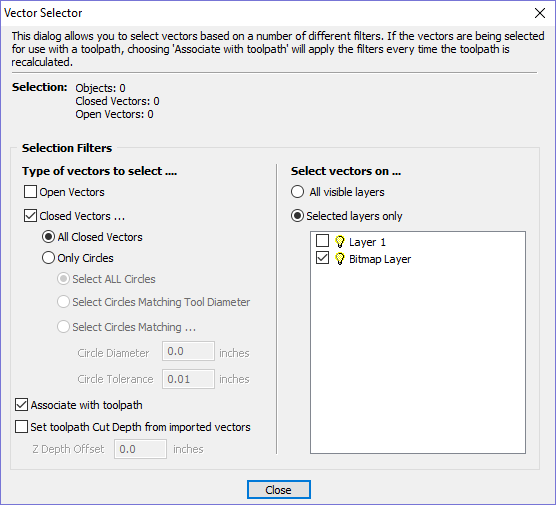
The most common way to use the Vector Selector is to select all the vectors on a given layer as shown in the screenshot of the dialog below.

In this example, the dialog has been used to select All Closed Vectors on the layer with the name Pocket.
Selection
The Selection: section at the top of the dialog is continuously updated to show the results of the current filter and the 2D view is also updated to show what is currently selected. The Objects: entry shows the total number of objects selected, if these objects include Text or Groups, this number may be less than the total of Closed and Open vectors displayed on the following line. For instance, a block of text is one object but will usually consist of many closed vectors. If a group contains both open and closed vectors, it will be selected as matching both Open and Closed filters.
Geometry Filters
The Geometry Filters section is used to specify constraints on the type of vectors to select. You can choose to select open vectors and/or closed vectors. Instead of selecting All Closed Vectors, the dialog can be used to select Only Circles and can even be used to specify an exact diameter and tolerance for the circles to be selected. This can be very useful for selecting vectors for drilling toolpaths, particularly if the vectors have not already been sorted into layers.
Layer Filter
The Layer Filter section allows you to pick one or more visible layers on which to select vectors which match the geometry filter. Alternatively, the All visible layers option disables the filtering by layer and selects all vectors which match the geometry filter regardless of the layer they are on, as long as that layer is visible.
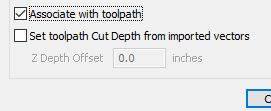
The Associate with toolpath option will be explained in the next section.
Advanced Toolpath Templates
By associating a template with the result of a Vector Selector filter, we can make a template to automatically select the vectors it is intended to machine. A simple case would be to create a template which consisted of a Pocketing toolpath set up to machine all closed vectors on a layer called Pocket. After loading this template into a new job and choosing Toolpaths ► Recalculate All Toolpaths , the toolpath would be recalculated automatically selecting all closed vectors on the layer called Pocket.
The advanced templates are created by selecting the vectors for a toolpath using the button on the toolpath form. When a toolpath form is first opened, the Vector Selection: section on the form will show that vectors are being selected manually as shown below...

Pressing the button will display the Vector Selector form as shown previously. After making your geometry selection and before you close the form, select the Associate with toolpath option on the form as shown below.

After the Vector Selector form closes, the Toolpath form will indicate that Vector Selection is now 'Automatic' as shown below...

When you re-calculate or edit a toolpath that has the Vector Selection mode set to automatic, the vectors which match the filter when the toolpath is re-calculated or edited will be selected. To cancel the Automatic vector selection mode, you can just select the vectors to machine normally with the mouse, or use the button to bring up the Vector Selector dialog again (the settings are remembered) and uncheck the Associate with toolpath option.

If toolpaths with the Vector Selection mode set to Automatic are saved as templates, these setting are saved with the template. When the template is re-opened and the toolpaths recalculated, they will automatically select all vectors which match the filters specified with the Vector Selector for that toolpath.
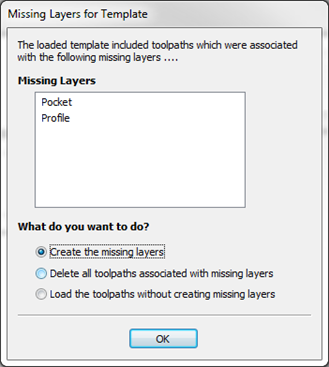
If you load a toolpath template which has toolpaths associated with layers which don't exist in the current file, the Missing Layers for Template dialog will be displayed. It lists all the missing layers and offers you the choice of having them created automatically, deleting toolpaths associated with missing layers or just loading the toolpaths as is.
Choosing to allow the dialog to automatically create the missing layers allows a toolpath template to be used to create 'standard' layers for machining operations and load the toolpaths ready to be calculated. All you then need to do is move vectors to the appropriate layers and recalculate all the toolpaths.
Choosing the Delete all toolpaths associated with missing layers option allows you to create a single template with many toolpaths and have the ones which aren't appropriate to the current job automatically deleted.